

How to shoot lightning.
/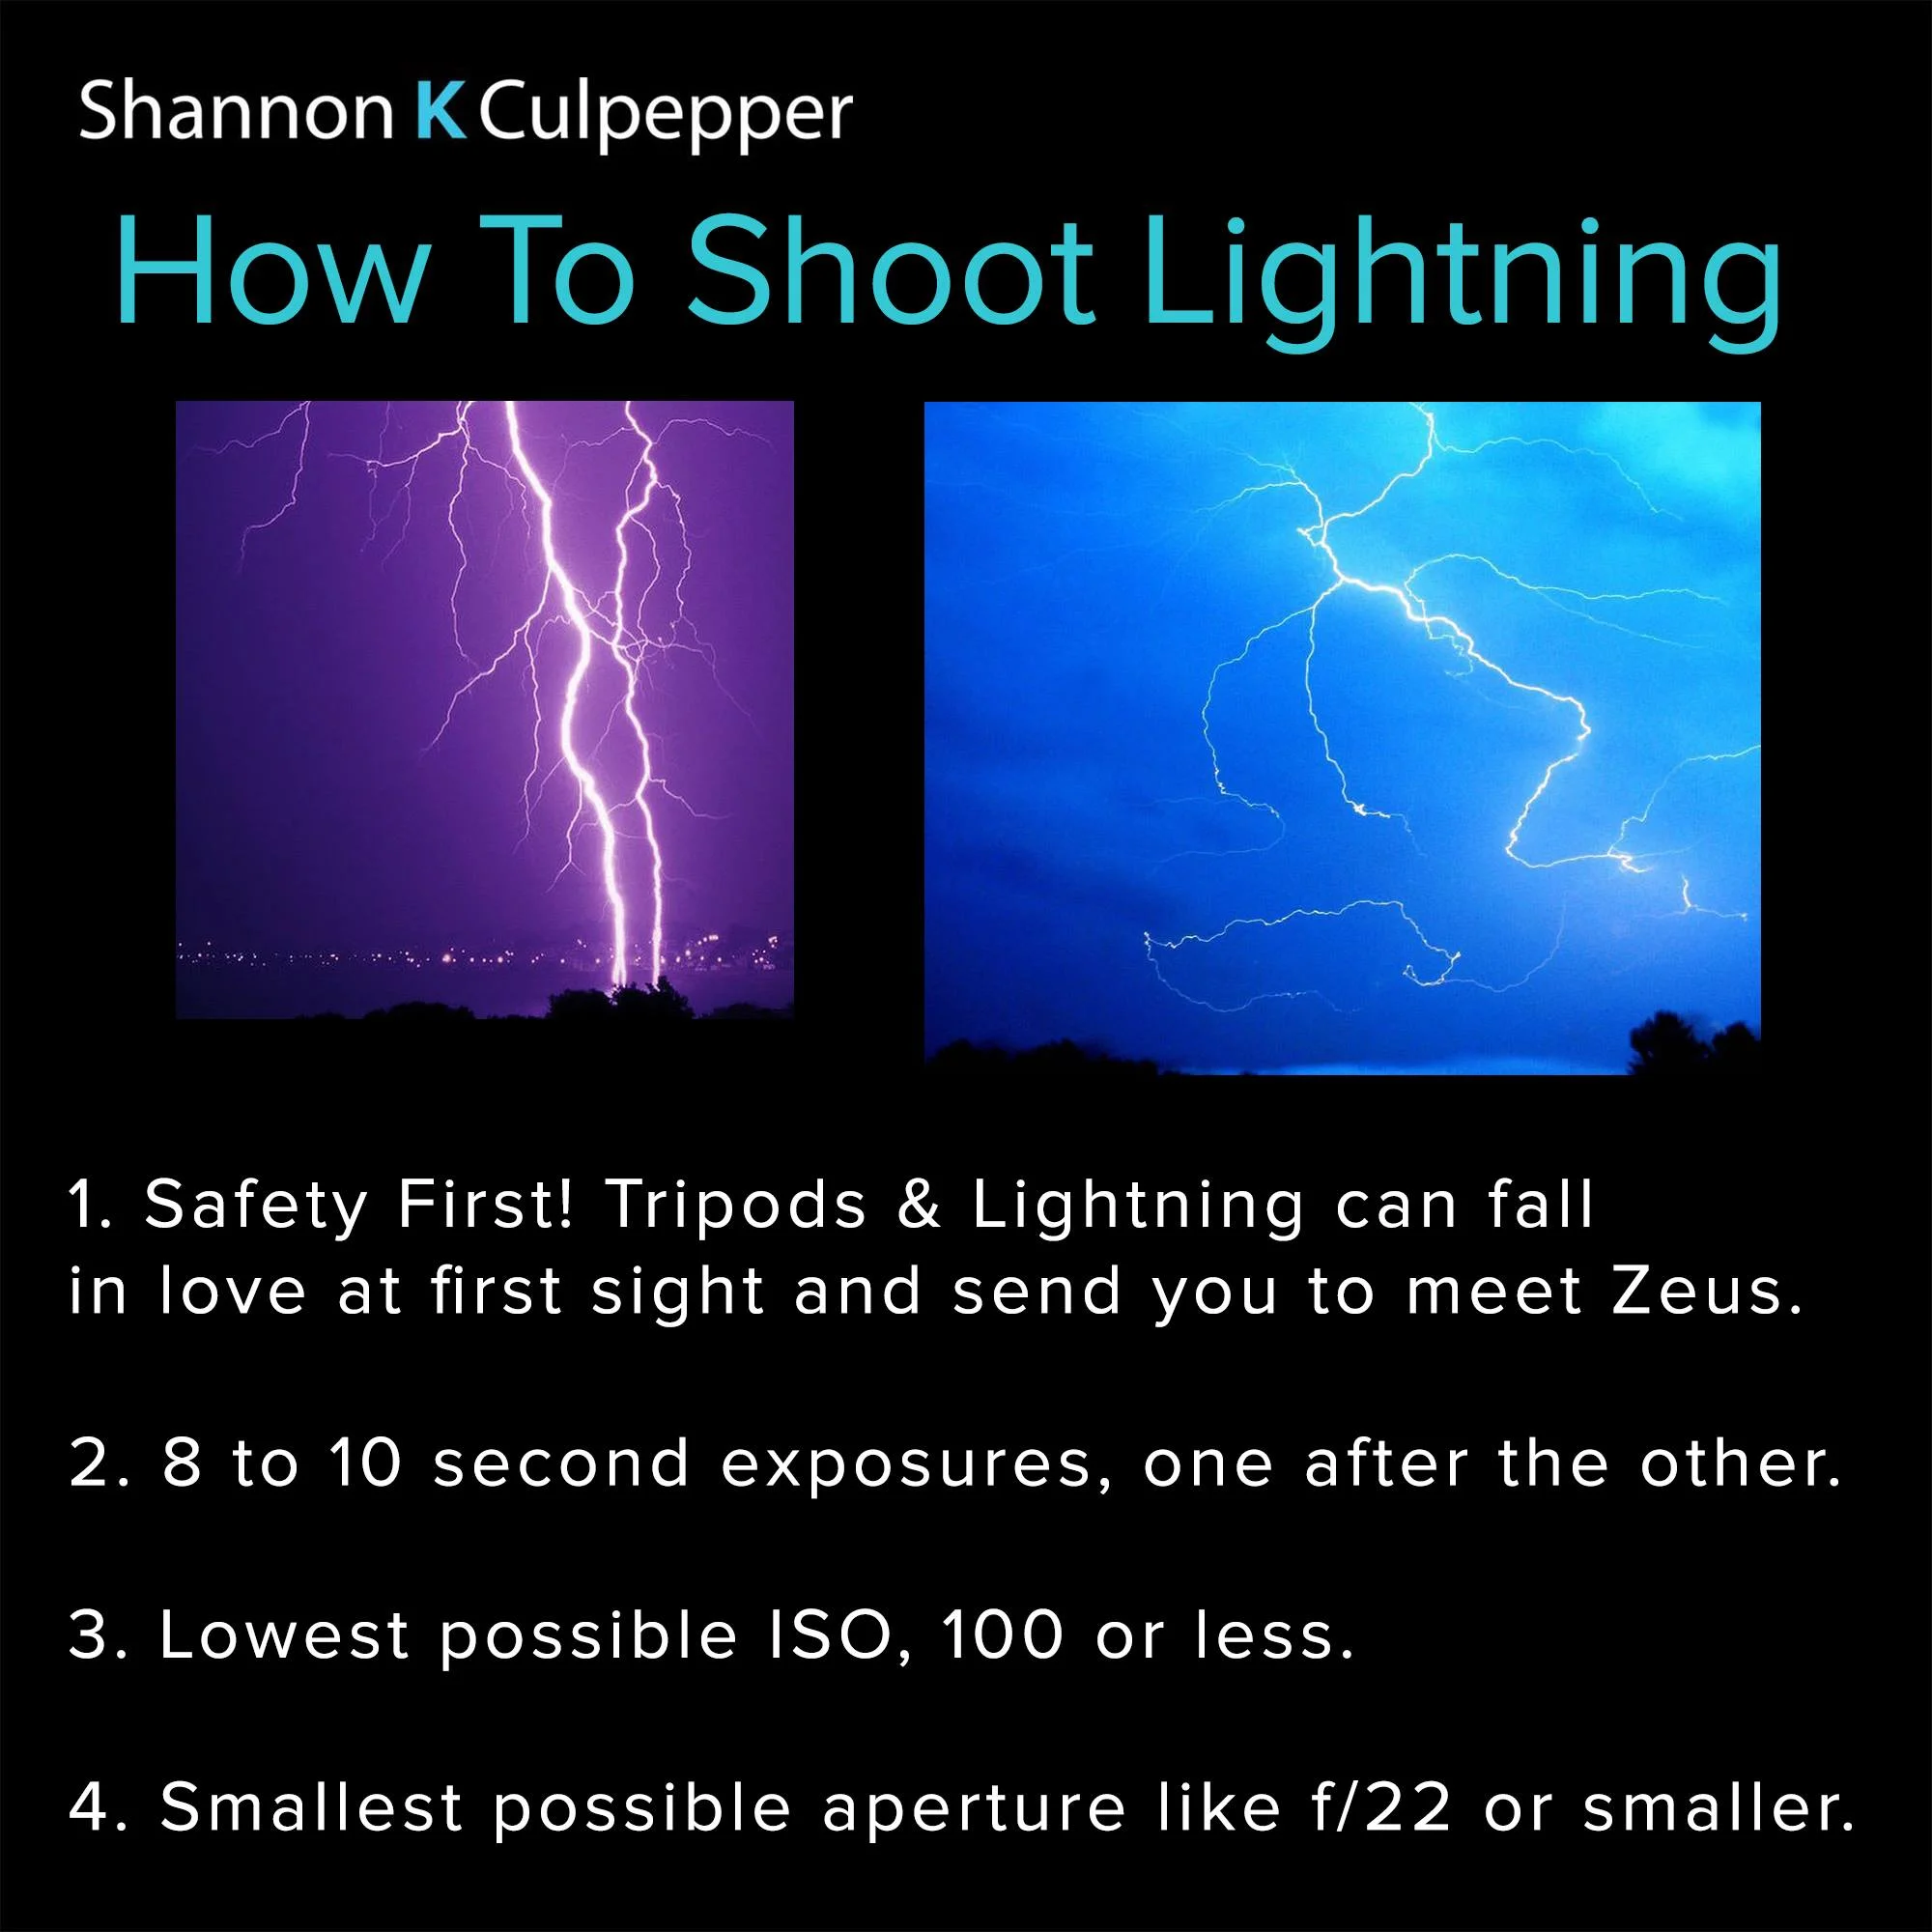
Several group members have asked me to explain how I shoot lightning so I thought I'd make this photo so you can save it to your phones. Now I know this is not how everyone else does it. There are a couple of different ways to capture Zeus' thunderbolt but this is the way I prefer. The picture on the left was taken with a tripod from the top of a 12 story building (I was safely 20 feet away, using a remote from inside my apartment while my camera was out on the deck) and the one on the right is handheld.
So first and most obvious, please be careful. The best way to not get struck by lightning while you’re tying to catch it by its pixilated tail, is to not be standing next to your camera while you shoot. You can use a remote for this or you can come in, press the release button and then step away during the 8-10 second exposure. Over 2000 people are killed worldwide by lightning per year so please don’t be stupid.
Secondly, you’re going to set your camera settings as follows:
-Try to use a lens that’s has a wider angle. The more zoomed in you are the smaller your sky canvas becomes and the less area you cover which means you’re less likely to catch a bolt.
-Put your camera on manual mode.
-Turn off auto focus, use manual focus and focus on a detail, tree line or light you can see in the distance. If you don’t really have a detail, like if you’re shooting over an ocean, try to focus about 30-50 yards out.
-Set your ISO at your lowest possible option, 100 or less.
-Set you aperture to your smallest aperture (highest number, I know it doesn’t make sense, but I didn’t come up with the system) like f/22 or smaller. If you look at your lens while your changing your aperture you can see if the iris is closed down to a very small hole.
-Start with 8-10 full second exposures for your shutter speed.
This is just a starting place. Every night is different depending on if the moon is out or how many lights are on your horizon. So experiment with your shutter speed only. If your picture is dark, add more time. If your picture is fried, cut back on the time. The goal is to get a nicely exposed shot without lightning first.
Third, think about composition. Night shots with lightning look great over water. It’s always nice to have something interesting in the foreground: a silhouette of a building, mountain, windmill, sculpture, old car, lighthouse, etc. A city skyline is also a wonderful addition to a lightning shot. A moving ocean, river or even a line traffic at 8 seconds can look awesome and artistic.
Fourth, point your camera in the general direction where the lighting has been seen. Then you’re going to begin shooting 100-200 - 8-10 second exposures in a row, one after the other. Don’t wait till you think it’s going to strike because then you’ll be too late. What you’re hoping to do is open windows of time and you’re inviting the lightning to join the party. Many lightning bolts, “positive lightning” or “cloud to ground lightning” travel at one-thousanths of a second. It depends on the kind of lightning, how long it cascades but needless to say, it’s a short enough time that if you don’t have your tripod with you, you can handhold your camera and get a shot (preferably from inside your house where you’re nice and safe.) Without a tripod everything else in the picture will be blurry but your lightning will be crisp.
That’s all it takes to catch lightning.
As I mentioned there are a couple of other ways to do this. Some people set their cameras up at 1/4 or 1/2 of a second (Largest aperture & ISO 400) and they shoot thousands of shots in a row just hoping to catch something.
Another really useful tool is a Lightning Trigger which is a device that you mount on your camera’s hot shoe that works kind of like a flash slave. When the lighting starts, it instantaneously opens your camera’s shutter. I think this would be fun to play with but I still think I prefer my method.
I hope this helps and I hope you all safely catch yourself some lightning.